Wednesday, February 26, 2014

12 Tags of 2014 - February

In keeping with my resolution to make all 12 tags this year I'm sharing my take on Tim's February tag.  I almost forgot to about it...realizing just yesterday that I only had until this Friday to get it done.


I tried the chalkboard technique that Tim used on his tag and it just didn't work for me so I used a different chalkboard technique. I read his instructions again and can only figure that I'm heating the embossing powder for too long. I'll give it another try but might not have time before Friday.

This tag involved a lot of improvising. I didn't have the new stamps, or the Industrious Stickers, so I substituted there.  The stamp is from the My Favorite Things-Chalkboard Greetings stamp set.  I embossed it in white and then rubbed Ranger Adirondack Snow Cap pigment ink into the background with my finger.  I edged it with a chalk marker.  The arrow is from Tim's Sizzix Bigz Love Struck Die.  The border is from Tim's Sizzix Decorative Strip Vintage Lace die.  Both were cut from manila cardstock covered with aluminum tape and then distressed with a combination of Ranger Latte alcohol ink and Snow Cap alcohol ink mixative.  I also added the Ideaology Philosophy Tag and Wire Pin.


Another habit I'm trying to get into is making two of everything.  It usually doesn't take much more time, since all of the supplies are already out, and that way I have one to keep and one to share!
 
Have a great day!

Tuesday, February 18, 2014

RubberMoon Moonmail Club ATC Swap

I have always been a big fan of RubberMoon Stamps.  I have collected quite a few images over the years so I was thrilled to find out that the stamp company had recently been purchased by Kristen Powers (aka KaePea).  KaePea has created a brand new website and blog and also started a monthly stamp subscription program called Moonmail Club.  Each month we receive an exclusive stamp created by one of the RubberMoon artists.  There is also an exclusive Facebook group, private video tutorials and lots of extra goodies!

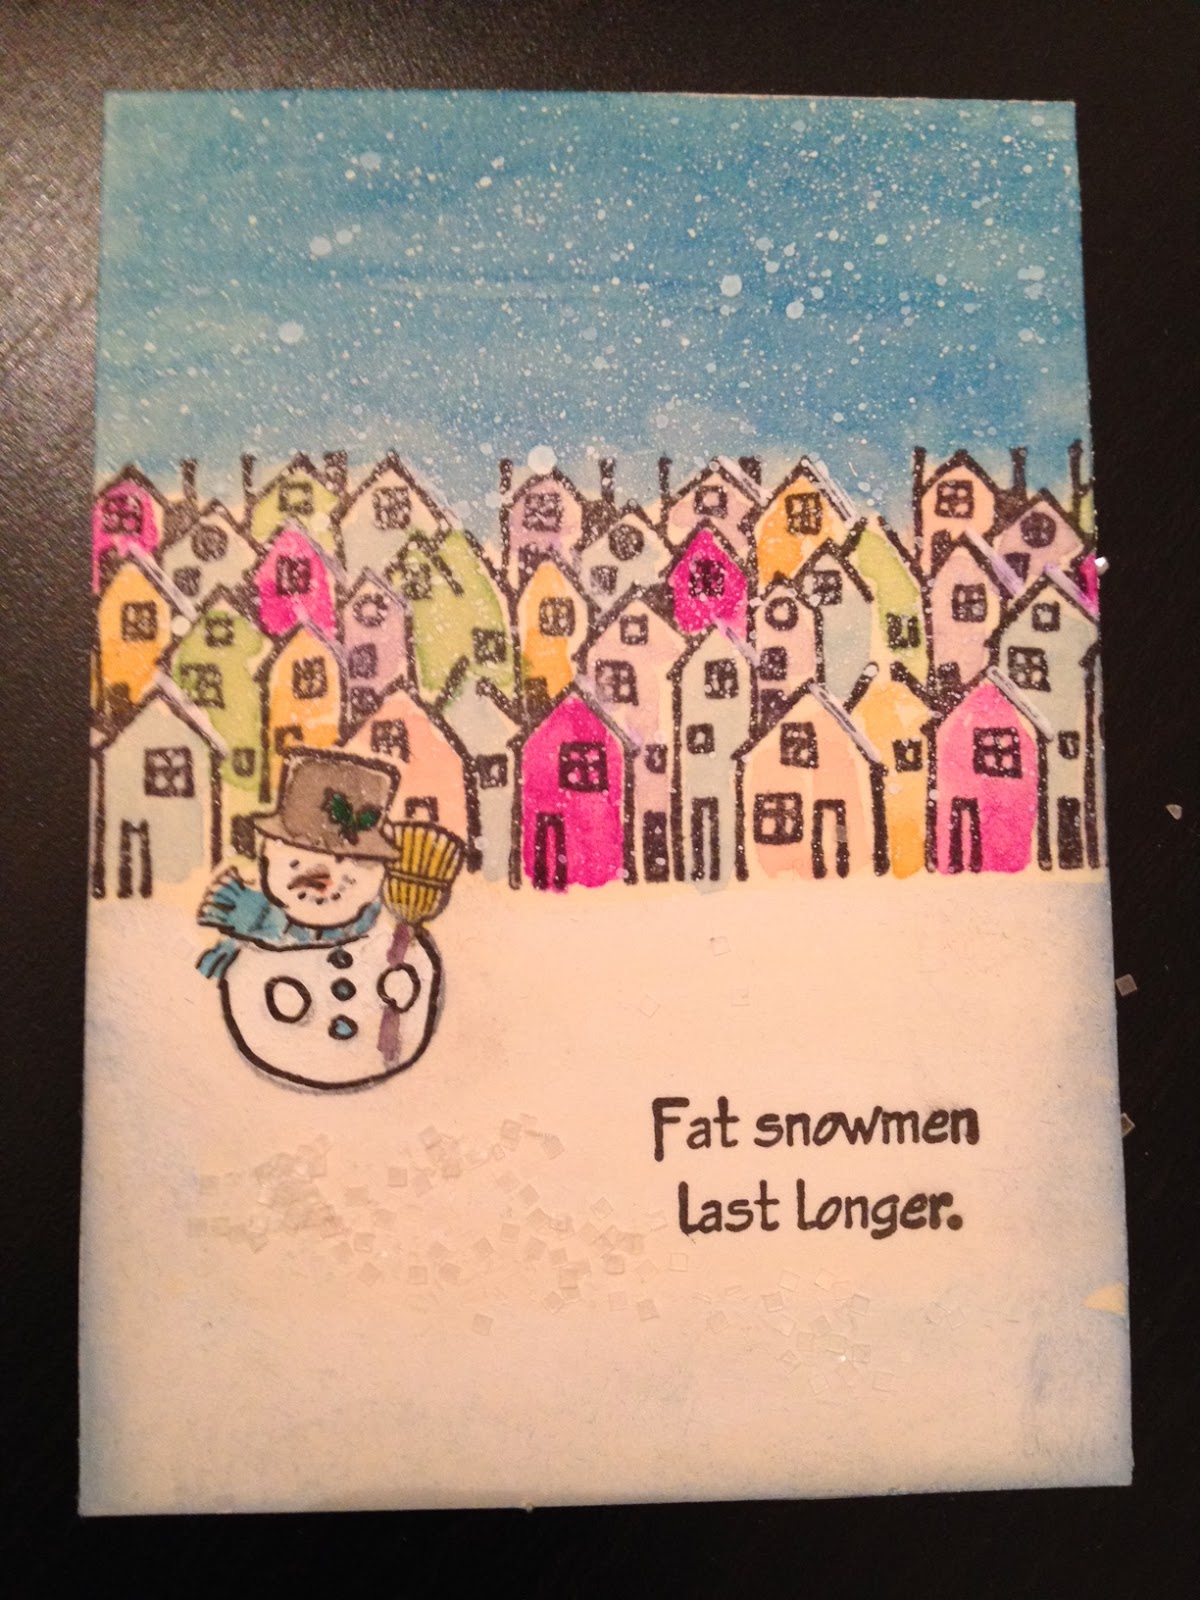
To celebrate the very first Moonmail stamp and the creation of the club we held an ATC swap.  Each person who participated received the mailing address of another participant so you only knew who you were sending an ATC to but didn't know where your's would be coming from!  My ATC came from Janet in Oklahoma and I just love it!  Since I live in Florida I think snow is magical!  And this year I really wished I could go somewhere to see some.  Albeit from inside of a nice warm house...but I would have loved it!  Here's the ATC I received from Janet...


She even went so far as to stamp the houses along the envelope border and lined it with a white pen to continue the snow theme and she sent it along with the cute handmade owl card!  Thanks Janet!  I love it all!!

 
My ATC went to Ceci in Washington state so it literally traveled from one corner of the United States to the other!  Ceci was very happy with it so I was glad.  Here's what I sent out...


It's my first ATC swap and I was very excited so I had a difficult time squashing all of the stamps I wanted to use into such a small space! You can see that I didn't do very well because my ATC is a book format. That's the only way I could fit everything in!!! I used watercolor pencils and a waterbrush to do the coloring.  And I discovered that I LOVE using watercolor pencils!
 
One swap participant lives in Australia so we still haven't seen all of the swap ATCs yet.  I had so much fun and I hope that we can have future swaps!  Make sure you visit RubberMoon and take a look at all of the great images they have!  They're such fun stamps!!

Thursday, February 13, 2014

Cute Little Valentines

Hi All! Just wanted to pop in and share the cute little valentine cards that I made with my Paper Smooches stamps and a couple of Sizzix dies.

When trying to decide what I wanted to make I realized that many of the Paper Smooches images and sayings were similar to the cute little store-bought valentines that kids use to give to their friends...only better!  I started with the Sizzix Bigz XL Mini-Correspondence die by Brenda Walton.  I cut the little cards using white card stock and got to stamping!  It was a lot of fun and I almost wish I had needed to make more so I could keep going!  Once they were stamped I did some quick coloring with watercolor pencils and a water brush.  I stamped some little hearts around the images and then edged them with Worn Lipstick distress ink.  So cute!!


The images used are from the following Paper Smooches stamp sets: Woofers & Tweeters, Sugar Rush, Chit Chat, My Peeps, Party Posse, Nine Lives, Briny Blue, and Giddy Gumdrops.
 
I also used the mini-correspondence die to cut the little library card-type envelope.  You can't see it but when the recipient removes the little valentine card they'll see "Happy Valentine's Day!" stamped on the envelope behind the card.


I used the Sizzix Bigz XL Treat Popper die, also by Brenda Walton, for the candy holder.  I embellished them with a piece from the Sizzix Scallop Eyelet Edge decorative strip die cut from white paper.  Then I attached the valentine card with curling ribbon.  Super easy and fun!  All of my co-workers loved them!

Have a Happy Valentine's Day!

I'm linking this to the Paper Smooches Fun & Cute Challenge.  Also, linking to the Simon Says Stamp Monday Challenge blog where the theme is We Love Stamps.


Tuesday, January 28, 2014

12 Tags of 2014 - January

It's a new year and time for a new tag!  I hope that completing the first tag of the year will create the momentum needed to get all 12 tags done this year...something I've never done!  So here's tag #1...


The background text not perfectly straight creates an illusion that the picture is crooked! How strange!

Anyhoo, I really liked Tim's tag but wanted something more colorful so I took that route with my background using Picked Raspberry, Spiced Marmalade, Peacock Feathers and Seedless Preserves stains instead of Pumice Stone.  The black ink over the stencil, and the pocket watch, covered up a lot of the color but I'm still happy with it.  I used chit chat stickers that express things I want for myself this year and a sentiment to complement those words!  Looking at it now I wish I had made the pocket watch a color...maybe Seedless Preserves or Peacock Feathers!?  I might have to try that.

I really enjoyed working with the pocket watch die and have ideas for some other projects!  I hope to get back to regular blogging and blog visiting...having neglected both over the last 6 months! Thanks so much for stopping by to see what I'm up to.  I hope you get to do something crafty soon!

Sunday, December 29, 2013

12 Tags of 2013 - December

When I was growing up there was only one Christmas decoration that we put up outside of our house.  We had a set of red plastic bells that plugged into an electrical outlet behind our front porch light.  There was a clear twinkle bulb inside each bell and at night when we turned on the porch light they would twinkle and play music!  I can remember hearing them from inside the house...and listening for them when I walked up the driveway outside.  To this day I remember those red bells every time Christmas time comes around.

So for my December tag I recreated those red bells.  I pretty much followed Tim's steps to create the tag.  The bells and bow were colored with alcohol inks.  I cut the bottom section of one bell away to create the front piece.  The silver bead was aged with a combination of slate and snow cap alcohol ink.  I also dabbed the bells with the same combination to give them some imperfections.   I cut through the score lines on the bow and wove a wood skewer between the sections to hold them in place while I heated and shaped it.  I used a different sentiment and finished the tag off with a piece of tarnished tinsel garland!


I hope everyone had a wonderful holiday and I wish you all a happy, healthy and prosperous New Year!

Wednesday, October 30, 2013

12 Tags of 2013 - October

I finally took the time to participate in this month's 12 Tags of 2013!  I've only made one other tag this year.  Since I love Halloween I couldn't pass up making one for this theme.  As a matter of fact...I made three!  The first and second followed along with Tim's techniques and design.  The distress paint colors that he used were fabulous!

I also love the larger tags so I used one of those to create the third tag.  I added the apothecary bottles at the bottom which I cut from plastic packaging, colored with alcohol inks and then a layer of frosted film.  Three tags means I have some to share so I gave the first one below to a friend!


Thanks so much for stopping to take a look!  Have a great day!

Tuesday, October 8, 2013

Hello Again!

I hope that all is well with all of you!  It's been a long time since I've posted.  Time just seems to slip away and I haven't quite figured out where it goes yet!  I did a much needed clean-out of  my craft room.  Donated bags and bags of goods and supplies to schools/churches and I still have way too much stuff.  But, like everything else, it's a work in progress.  I'm also doing a little remodeling...not built-in (I wish!)...but my brother-in-law helped me put together a new work table and I'm adding some bookcases from Ikea for storage.  I'll share photos once it all comes together but right now things are scattered about the room and the house.

In the midst of it all I managed to create this Apothecary Tag Book which I'll be teaching this Saturday, October 12, from 10am-2pm at Whim So Doodle in St. Petersburg, FL.


We'll be using some of the new Tim Holtz Halloween stamp sets including The Chemist and the new Halloween Blueprints.  The tags will cover techniques from both of Tim's Compendium of Curiosities books.  I believe there are still a few spots left in the class so if you live in the area I'd love to meet you!

Wish me luck as this is my first foray into teaching and I'm getting a little nervous about the whole thing.  As long as everyone has fun and learns something I'll consider it a success!!