Hey Everyone! Hope all is well in your corner of the world! I'm here with my July tag for
Tim's 12 Tags of 2014 and it isn't July 31st!!!
I was really excited about making this tag but didn't have any of the dies, or the embossing folder, that Tim used. I did, however, recently acquire the Stampers Anonymous Nautical Blueprints stamp set so I decided to make do with what I had on hand and soldier on!!
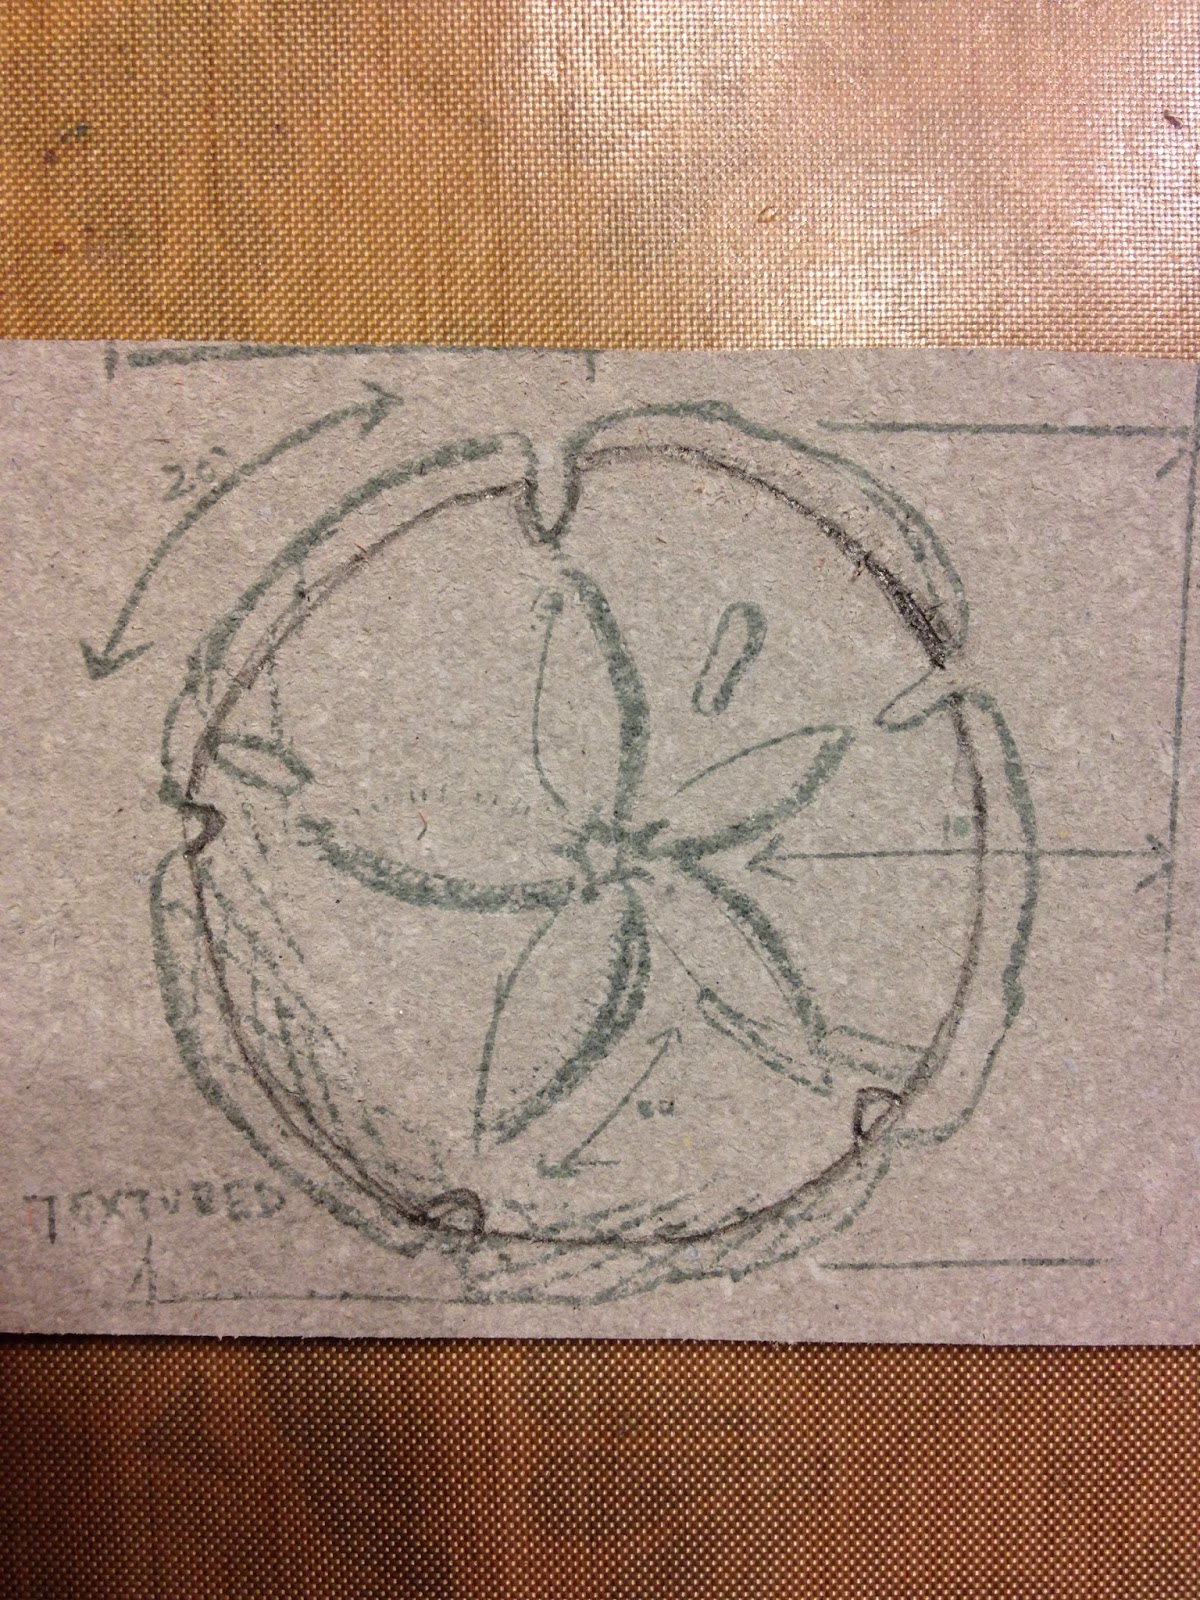
To start I stamped the Nautical Blueprints sand dollar and sea horse images onto grungeboard.
The sand dollar is a little bigger than the diecut shape so I traced around the inside of the stamped line with a pencil to and cut it down smaller.
Then I used my exacto knife to score the center so that it would show up after painting.
I stamped the sand dollar a second time and cut the star out to make the starfish.
And here are my sea horses after cutting. The stamped image is more detailed but you won't see the stamped lines after the surface techniques so you don't have to cut it that precisely.
And here are the finished pieces after following the surface techniques in Tim's instructions!!! Not that much different than if I had used the dies! Of course, it certainly would have been easier with the dies!
I used an embossing folder from the Retro Cirque Texture Fades set that I thought looked like waves. The seaweed greenery was cut from a couple of other dies that I have including Tim's Festive Greenery strip die.
And there you have it! One to keep and one to share. Wow, having this tag finished so early in the month makes me feel like I'm way ahead of the game! Oh, if only that were true!!
Thanks for stopping by!