Thanks for stopping by!
Showing posts with label Ideaology. Show all posts
Showing posts with label Ideaology. Show all posts
Thursday, January 29, 2015
12 Tags of 2015 - January
Just popping in to post my January tag for Tim's 12 Tags of 2015. I didn't realize that the month was running out on me so I put this together rather quickly last night! I didn't deviate much from Tim's process other than not using the distress stain spray since I don't have any of them. I used some Tsukineko walnut stain antiquing spray which I discovered doesn't quite dry the same!! But in the end it all worked out.
Friday, December 19, 2014
12 Tags of 2014 - December
Happy Friday Everyone! I'm here to post my final tag for Tim's 12 Tags of 2014! I actually made all twelve tags for the first time EVER!!!
I really liked the tag that Tim created for this month. I have the previously released Reindeer Flight die but not the new Prancing Deer. I thought about using the older die and creating some antlers with the Branch Tree die but I decided to use the new Angelic die instead and I'm really glad I did!
Here's my tag...
I attempted Tim's method for the background on the tag but it didn't work out for me. I don't have the distress stain sprays so I used Perfect Pearls for the metallic spray and it didn't mix well with the distress paint and my homemade Mini Mister spray stain. The tag remained sticky after it had dried and it was a little brighter than I liked. I'm sure there's a lesson on that somewhere in the Creative Chemistry 102 class!! Although I've paid for the class I haven't watched any of the content so I found out the hard way!! I went back to the drawing board and created the background by misting the tag with water and then swiping it through Faded Jeans and Brushed Pewter distress stains.
The rest of the tag was made based on Tim's tutorial. I used the Starry Night embossing folder on the Frosted material. The angel was painted with Antique Linen distress paint. I added Mustard Seed distress glitter to her wings for some extra bling. The trumpet was painted with a Ranger Adirondack Metallic Gold paint dabber. If I had it to do over I probably would have painted her wings with the gold paint instead of using the distress glitter. I sprinkled the rock candy distress glitter on using my thumb and index finger (similar to the way you'd add a pinch of salt to a recipe) since I don't have that type of tea infuser. Walnut distress ink was then used to tone everything down. Originally I was going to use the word "Joy" on the tag because that's what this angel represents to me. But it didn't seem like enough so I chose "Peace on Earth" and added the Joyful muse token.
I'm totally impressed with myself for taking the time to do the actual sewing instead of stapling the Frosted to the background. I think it's a first for me! It only took two minutes since my sewing machine was already threaded with the right color of thread. Had it not been I might not have done it! It's also a little uneven because I was under the influence of pseudoephedrine for a sinus headache and my hands were shaky!
The Industrious Border sticker was in my possession thanks to Paula Cheney as it was in the Collection Folio class kit from her recent teaching trip to Whim So Doodle! The Frosted material was graciously supplied to me by my good friend Sue. She shared part of the package she bought when we met to take Paula's classes. Thanks Sue! Sometimes it takes a village to make a tag!
And there you have it! The final tag for 2014! This will probably be my last post for this year so I want to wish all of you Happy Holidays and may the New Year bring you joy, health and lots of love!
Thanks for stopping by!
Monday, August 18, 2014
ATB Summer Topiary
Hello! You've probably seen a lot of projects made with these little boxes, more fondly known as an ATB or artist trading block, since they've been popping up all over social media lately! They are very versatile and also addictive! I created my first ATB when I joined Frilly and Funkie as a guest designer back in May when I created this Mermaid ATB for their Vintage Seaside challenge.
The theme for the current challenge at Frilly and Funkie is Hip to be Square and we are tasked with creating a 3D vintage or shabby chic project based on a cube shape. The challenge is being sponsored by The Funkie Junkie Boutique. Sizzix designer, Eileen Hull, has a monthly Art From the Heart challenge on her blog and this month it's Anything Goes. Eileen is offering the winner of her challenge their choice of a die from her new release, Vintage Kitchen, when it comes out in December!
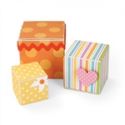
So I'm here to weigh in at both of those challenges with my ATB Summer Topiary! The graduated sizes of the boxes on Eileen's Sizzix Scoreboards XL die-Blocks/Cubes, 3D just scream topiary to me! But I added a little twist by turning the boxes corner to corner! It took me all weekend to put it together but it was so worth it! I had a blast and really felt my creative mojo creeping back! As always I have trouble with the picture-taking part! I tried both inside and outside and these were the best of the bunch.
For this challenge the team at Frilly and Funkie has joined forces with The Artists on the Block who are also showcasing 3D cube projects. Make sure you check out their projects for more inspiration! The ATB team comes up with some out-of-this-world art!!
The Simon Says Stamp Monday Challenge blog is also running an Anything Goes challenge so I'm entering this piece there. A randomly chosen winner can receive $50 to spend at Simon Says Stamp!
Over at Inspiration Journal the August Monthly Challenge is Everything Goes so I might as well join in that one, too! The August Monthly Challenge is sponsored by Inspiration Emporium and they are offering the winner a $50 to spend in the emporium!
I hope you like my project and maybe you'll be inspired to create a 3D cube project of your own and join in the fun! I've included links below for the many products I used in my project. These products are available at The Funkie Junkie Boutique. If you haven't visited Linda's store you're missing out!!
Thanks so much for stopping by my little corner of the world!

The theme for the current challenge at Frilly and Funkie is Hip to be Square and we are tasked with creating a 3D vintage or shabby chic project based on a cube shape. The challenge is being sponsored by The Funkie Junkie Boutique. Sizzix designer, Eileen Hull, has a monthly Art From the Heart challenge on her blog and this month it's Anything Goes. Eileen is offering the winner of her challenge their choice of a die from her new release, Vintage Kitchen, when it comes out in December!
So I'm here to weigh in at both of those challenges with my ATB Summer Topiary! The graduated sizes of the boxes on Eileen's Sizzix Scoreboards XL die-Blocks/Cubes, 3D just scream topiary to me! But I added a little twist by turning the boxes corner to corner! It took me all weekend to put it together but it was so worth it! I had a blast and really felt my creative mojo creeping back! As always I have trouble with the picture-taking part! I tried both inside and outside and these were the best of the bunch.
The boxes are covered with Tim's Wallflower paper. I used three of the sheets that have large floral images on them. The boxes were inked and I added peeled paint distress embossing powder to give them a mossy look. They are mounted on a thin wooden dowel that was stained with Walnut distress stain. After I ran the dowel through the boxes I embossed the exposed sections of the dowel with brushed corduroy distress embossing powder.
The topiary is decorated with flowers, butterflies and greenery created with Tim's Sizzix Alterations Tattered Flower Garland, Butterfly Frenzy and Spring Greenery decorative strip dies. Of course, Tim's new Layered Dragonfly die needed to make an appearance! I cut one dragonfly from grungeboard and then another from watercolor cardstock. I painted the bottom side and edges of the grungeboard die cut with distress paint. I embossed the watercolor cardstock die cut with the accompanying embossing folder and then added color using distress markers and a water brush. Then I sprayed Sunflower Sparkle perfect pearls onto my craft mat and painted that over the watercolors to add some shimmer! I glued the cardstock dragonfly onto the grungeboard dragonfly for stability and then mounted it on a floral wire that I shaped by curling it around a pencil.
The base started as a 3" terra cotta pot which I painted with various colors distress paint and then embossed with peeled paint distress embossing powder to give it a mossy look.
For this challenge the team at Frilly and Funkie has joined forces with The Artists on the Block who are also showcasing 3D cube projects. Make sure you check out their projects for more inspiration! The ATB team comes up with some out-of-this-world art!!
The Simon Says Stamp Monday Challenge blog is also running an Anything Goes challenge so I'm entering this piece there. A randomly chosen winner can receive $50 to spend at Simon Says Stamp!
Over at Inspiration Journal the August Monthly Challenge is Everything Goes so I might as well join in that one, too! The August Monthly Challenge is sponsored by Inspiration Emporium and they are offering the winner a $50 to spend in the emporium!
I hope you like my project and maybe you'll be inspired to create a 3D cube project of your own and join in the fun! I've included links below for the many products I used in my project. These products are available at The Funkie Junkie Boutique. If you haven't visited Linda's store you're missing out!!
Thanks so much for stopping by my little corner of the world!

Friday, June 13, 2014
12 Tags of 2014 - June
Just popping in to post my June tag for the Tim Holtz 12 Tags of 2014. I used the Harlequin layering stencil and the recently released Stamper's Anonymous Big Top stamp set. I really enjoyed 'printing' with the stencil and look forward to trying this technique with my other layering stencils.
My favorite part is the two diamonds to the left of the juggler that came out as pink and orange spots!! It looks like I had too much water on the right side though. And I need to improve on dying my crinkle ribbons! I think I'm working them too much causing the colors to get muddied together.
My favorite part is the two diamonds to the left of the juggler that came out as pink and orange spots!! It looks like I had too much water on the right side though. And I need to improve on dying my crinkle ribbons! I think I'm working them too much causing the colors to get muddied together.
I colored the juggling clown with distress markers and a water brush. Cutting out the little balls was tedious but worth it! I added some Ranger glossy accents to the balls, the base of the drum and the little buttons on his costume! I love that Big Top stamp set! It's great fun!
Monday, May 26, 2014
12 Tags of 2014 - May
I'm back with another post today for my version of Tim's tag for the month of May. The tag that you see here isn't the one that I originally began putting together. Before the background tag was inked I had picked out a different set of trinkets and a different ShadowPress folder. But then something Magical happened!
I wanted my background tag to be a little more colorful so I started by running a light coat of Antique Linen distress stain over the tag and then drying it with the heat tool. Then I used Peacock Feathers and Salty Ocean DI with the Bubble layering stencil. I inked around the edges of the tag with Squeezed Lemonade and Brushed Corduroy DI using an ink blender. Then I splattered water droplets over the tag and dried the entire tag again with the heat tool. And that's when the tag took a different direction! As the water droplets dried I watched this little shape emerge...
Any idea what it is??!! Those of us who frequent that Happy Place, known as Walt Disney World in my part of the country or Disneyland on the other side of the country, will know it as a Hidden Mickey!!! If you're not familiar with this there is a published book that documents the many occurrences of the Hidden Mickey's that can be found at Walt Disney World and Disneyland! Once I saw it on my tag I knew I couldn't cover it up! I also knew that I had to change the theme of my tag to go along with it. So here's the tag that I ended up with...
The Good Times shadowpress folder along with the word band and muse token definitely speak to the good times and fun that I've share with my friends and family when we visit the theme parks at Walt Disney World! It's one of my favorite places to go (except during the hottest months of the summer!) so I added the heart adornment that I colored with Red Pepper and Pearl alcohol ink. The enamel tag was tinted with Latte alcohol ink and then I embellished it using a phrase from the Words rub-ons. Most importantly the arrow from the Industrious stickers highlights my very own Hidden Mickey!
Needless to say this is now my FAVORITE tag of the year! Thanks for stopping by!
Thursday, May 22, 2014
CC3C Challenge #2 - Distress Glitter
I'm so happy that I was able to put something together for challenge #2 since I missed the first one!! The technique chosen for this week's Compendium of Curiosities Vol 3 challenge, hosted by the Linda Ledbetter and the Curiosity Crew, is Distress Glitter on page 56. The sponsor for this week, with a $25 gift certificate, is the Funkie Junkie's Boutique!
For my project I created a canvas using one of the burlap canvas panels from the District Market collection. I've been hoarding them so I decided it was time to put one to use! The photo is of my maternal grandparents. They never went to Paris but I just love this photo of them!
As you can see I glittered up Tim's Sizzix Alterations Eiffel Tower and then distressed it with walnut DI. The trellis pieces are leftover from my April Tag of 2014. I dabbed the mirror trellis with some latte alcohol ink to add some interest. The remaining embellishments include a French railroad ticket from the new Idea-ology Expedition Ephemera Pack, a hotel sticker from the Lost and Found Salvage Stickers, a crown from the Idea-ology Adornments Regal collection, and a band from the Idea-ology Observation Wordbands collection. I mounted the photo on a piece of Tim's French Industrial paper stash, distressed it with walnut DI and the added the words from the Idea-ology Life Quotes and Words rub-on sets.
Thanks for stopping by!
Subscribe to:
Posts (Atom)


