Monday, August 21, 2017

My Favorite Things Camp Create 2017 Round 2

This past week was round 2 of My Favorite Things Camp Create 2017.  There were 5 new challenges to participate in.  My first card linked up via Instagram.  For some reason I wasn't able to link these up the same way so I'm adding my cards here to link them up.

Day 2 - Magnificent Masking


Day 3- Background Bonanza


Day 4 - Monochromatic Magic


Day 5 - Delightful Die-cutting


On this last card I finally cracked open my Distress Oxide inks.  Very cool!


Saturday, July 8, 2017

MFT Card Challenges Weekly Sketch #340

Hi!  I missed the last two challenges but I'm back today with my entry for this week's sketch challenge on the MFT Card Challenges blog.

Here is the sketch presented...

Here is my card...


Supplies used: MFT Sweet Succulents stamps and die-namics, Die-namics Stitched Arch Stax and Tiny Hearts Bright paper pack.  The images were painted with Peerless watercolors on 140lb paper.

Thanks for stopping by!

Tuesday, June 20, 2017

MFT Card Challenges Weekly Sketch #337

Hi! I'm squeezing this one under the wire!  I realized this morning that the MFT weekly sketch challenge closes at noon today!  So I put this card together in record time.  Looking at it now I probably would have done a couple of things differently but it'll do in a pinch.

Here is the sketch presented on the MFT Card Challenges blog...


Here's my card...


Supplies used:  MFT Sow Much Cuteness stamps, MFT Magical Unicorns stamps, Fishtail Flags die-namics, End of the Rainbow die-namics, Sweet Celebration paper pack and Dots and Stripes Confection paper pack.

Thanks for stopping by!

Monday, June 19, 2017

Camp Create 2017 - Catch Up

I got a little behind in trying to complete my cards for MFT Camp Create 2017 during the work week.  So I spent yesterday finishing up the activities as well as the bonus activity that was given on day 4.

Here is my card for Day 3 - Spectacular Shakers


Supplies: MFT Catitude stamps, MFT Cool Cat stamps, MFT Our Story stamps and the Peek-a-boo Wonky Windows die-namics


Here is my card for Day 4 - Sensational Sliders


Supplies:  MFT Interactive Birthday Cake die-namics, MFT Big Birthday stamps, MFT Delicious Birthday stamps, MFT Dots and Stripes Bright paper pack and MFT Sweet Celebrations paper pack.


Here is my card for Day 4 Bonus - Divine Dry Embossing


Supplies: Big Hugs die-namics, MFT Mini Modern Blooms stamps/dies


Here is my card for Day 5 - Glitzy Glitter


Supplies: MFT Essential Sentiments stamps, Blue Prints 28 die-namics, Dots and Stripes Confection paper pack


So there you have it...I completed all of the MFT Camp Create 2017 activities!  It was a lot of fun!

Tuesday, June 13, 2017

Camp Create 2017 Day 2 - Remarkable Resist

I'm back for day 2 of Camp Create 2017 at My Favorite Things.  The activity for day 2 is to create a card using a watercolor resist technique.
 
I embossed the Whimsical Waves background stamp on a piece of watercolors with white embossing powder.  Then I added Peerless watercolors in Robin's Egg Blue, Forget-Me-Not Blue and Turquoise.  I'm listing the colors so that I can come back to this post to remind myself what they were.  I'll definitely be recreating that combination for more cards!
 
 Here is the background piece that I created before I used it on my card.  I have to say that I am so in love with this piece of paper that I didn't want to cut it and put it on the card!  If a certain friend reads this she will laugh out loud.  She makes fun of me because I have a piece of ribbon that I dyed years ago but refuse to cut because it turned out so beautifully!


However, unlike the ribbon I did trim this piece and create the card below.  I added images from the MFT Mermazing stamp set that I colored with copic markers.  The banner is from the Blueprints #28 die-namics set.


I'm really happy with how this card turned out and I've earned my second badge!


Camp Create 2017 Day 1 - Wonderful Watercolor

I'm participating in Camp Create 2017 at My Favorite Things.  I'm not sure I can keep up with the daily activities but I'll give it my best shot!

The activity for day 1 is to create a card using watercolor paints.  I chose to recreate the card that was demonstrated in the day 1 video - a galactic background using Prima watercolors.

Here is my card...


I used Canson 140lb watercolor paper and the Prima Classics watercolors.  The white spatter is Tim Holtz Picket Fence distress paint applied with the spatter brush.  The stacked die-cut word is from the Thanks and Hello die-namics.

I'll be honest...once I began painting this I thought it looked like a hot mess!  I nearly gave up but kept pushing through since I had already started and had watercolor paint everywhere!  If I look at it too closely I'm still not sure I like it but I did complete the activity so it counts and I earned today's badge!


Sunday, June 11, 2017

MFT Card Challenges Weekly Sketch #336

Hi! I'm here with my entry for the weekly sketch challenge at the MFT Card Challenges blog.
 
I've kept my card sweet and simple this week.


This card turned out to be a test of what inks do and don't work well with these stamps and the watercolor paper that I cut them from!  The flowers are from the Mini Modern Blooms stamp/die-namics set.  They were stamped with several different types of inks on watercolor paper.  The notched banner was cut from the MFT Sweet Celebration paper pad.  The sentiment banner is from Blueprints Die-namics #28 and I stamped a sentiment from the Springtime Blooms stamp set.
 
Thanks for stopping by!


Sunday, June 4, 2017

MFT Card Challenges Weekly Sketch #335

Hi! I'm back again with my take on this week's sketch challenge from the MFT Card Challenges blog.  Below is the sketch for this week.
Sketch Challenge 335 #mftstamps

Here is my interpretation...


I had a difficult time with this one as I started a completely different card and then scrapped it.  I'm sure I was overthinking it!
 
The ink blended background was done with Tim Holtz Distress Ink in Salty Ocean and Mermaid Lagoon.  The die-cut images were watercolored with Zig Clean Color Real Brush Pens.  A complete list of supplies from My Favorite Things is shown below.
 
 
Thanks for stopping by!


Saturday, May 27, 2017

My Favorite Things Weekly Sketch Challenge

I wasn't sure my blog would still be here!  It's been a long time since I've posted!  Today I'm sharing my entry for the weekly sketch challenge at My Favorite Things.  The details for the challenge can be found here if you're interested in joining the fun!

Here is the sketch...


And here is my take on it...


I used two My Favorite Things stamp/die-namic sets, Tiki Party and Polynesian Paradise, along with the Blueprints #16 die-namics and the Stitched Basic Edges 2 die-namics.  The sunset background was blended with Tim Holtz Mustard Seed, Picked Raspberry, Wilted Violet and Blueprint distress inks.  The images were colored with copic markers.

I had fun putting this card together and hope I can play along on a regular basis.  Thanks for stopping by!


Friday, October 23, 2015

Rubbermoon Moonmail Club ATC Swap - September 2015

Well, I think it's about time to blow the dust off of this blog and put it back into action!  At least I hope to do that!

After a long hiatus I decided to participate in the most recent Rubbermoon Moonmail ATC swap.  If you're not familiar with Rubbermoon you should definitely check them out here.  And if you're not familiar with the Moonmail club you should check it out here!  Tons of fun every month!  Kristen recently began offering Claudia Rose rubber stamps!  For those who have been around rubber stamping for a while you'll remember all of those super cute little images that Claudia Rose was known for!  Well now you can order them from Rubbermoon!

For September we received this fantastic Claudia Rose rubber stamp in our Moonmail package along with several other goodies!  You really should consider joining the Moonmail club!  I love getting my package every month!


I received this lovely ATC from the very talented and funny Lydia!  She gets some serious props for fussy-cutting that moon sliver! She also sent the cute little mini envelope filled with die cut leopard-patterned wings!  Lydia keeps us all in stitches in the special Facebook group for members of the MoonMail club! 


The ATC below, which I created using Claudia's stamp, went to Carissa.  The cute little car and the sentiment are also Rubbermoon images from the very talented Barb Rogers.


I also sent Carissa some Day of the Dead faux postage made with Kristen's new Milagros stamp collection however I neglected to take a photo of those before I put them in the envelope!

Kristen isn't just the owner of Rubbermoon she's also one of the very talented artists who create Rubbermoon rubber stamp images!  I think I've ordered almost the entire Milagros collection.  I hope to have a good play day with them in the near future!  So if you haven't already done so head on over to Rubbermoon to see what it's all about.  While you're there take a look at the Rubbemoon blog too!

Thursday, January 29, 2015

12 Tags of 2015 - January

Just popping in to post my January tag for Tim's 12 Tags of 2015.  I didn't realize that the month was running out on me so I put this together rather quickly last night!  I didn't deviate much from Tim's process other than not using the distress stain spray since I don't have any of them.  I used some Tsukineko walnut stain antiquing spray which I discovered doesn't quite dry the same!!  But in the end it all worked out.

 
Thanks for stopping by!


Friday, December 19, 2014

12 Tags of 2014 - December

Happy Friday Everyone!  I'm here to post my final tag for Tim's 12 Tags of 2014!  I actually made all twelve tags for the first time EVER!!!

I really liked the tag that Tim created for this month.  I have the previously released Reindeer Flight die but not the new Prancing Deer.  I thought about using the older die and creating some antlers with the Branch Tree die but I decided to use the new Angelic die instead and I'm really glad I did!

Here's my tag...

 
I attempted Tim's method for the background on the tag but it didn't work out for me.  I don't have the distress stain sprays so I used Perfect Pearls for the metallic spray and it didn't mix well with the distress paint and my homemade Mini Mister spray stain.  The tag remained sticky after it had dried and it was a little brighter than I liked.  I'm sure there's a lesson on that somewhere in the Creative Chemistry 102 class!!  Although I've paid for the class I haven't watched any of the content so I found out the hard way!!  I went back to the drawing board and created the background by misting the tag with water and then swiping it through Faded Jeans and Brushed Pewter distress stains.
 
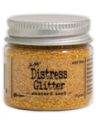
The rest of the tag was made based on Tim's tutorial.  I used the Starry Night embossing folder on the Frosted material.  The angel was painted with Antique Linen distress paint. I added Mustard Seed distress glitter to her wings for some extra bling. The trumpet was painted with a Ranger Adirondack Metallic Gold paint dabber. If I had it to do over I probably would have painted her wings with the gold paint instead of using the distress glitter. I sprinkled the rock candy distress glitter on using my thumb and index finger (similar to the way you'd add a pinch of salt to a recipe) since I don't have that type of tea infuser. Walnut distress ink was then used to tone everything down.  Originally I was going to use the word "Joy" on the tag because that's what this angel represents to me. But it didn't seem like enough so I chose "Peace on Earth" and added the Joyful muse token.
 
I'm totally impressed with myself for taking the time to do the actual sewing instead of stapling the Frosted to the background.  I think it's a first for me!  It only took two minutes since my sewing machine was already threaded with the right color of thread.  Had it not been I might not have done it!  It's also a little uneven because I was under the influence of pseudoephedrine for a sinus headache and my hands were shaky!
 
The Industrious Border sticker was in my possession thanks to Paula Cheney as it was in the Collection Folio class kit from her recent teaching trip to Whim So Doodle!  The Frosted material was graciously supplied to me by my good friend Sue. She shared part of the package she bought when we met to take Paula's classes. Thanks Sue!  Sometimes it takes a village to make a tag!
 
And there you have it!  The final tag for 2014!  This will probably be my last post for this year so I want to wish all of you Happy Holidays and may the New Year bring you joy, health and lots of love!
 
Thanks for stopping by!


Tuesday, December 16, 2014

Holiday Ornaments with Rubbermoon Arts


Happy Holidays to everyone!  I'm here today to share some cute ornaments that I made with some holiday images that I recently bought from RubberMoon Art Stamps!  Aren't they cute?!  I just love how they turned out!  Below I've shared how I made them.


I stamped the central images twice so that I could mount them with foam tape for dimension.  The images were colored with Distress markers and a water brush.  I also added stickles glitter accents to them.  The finished designs were mounted on a scalloped circle die cut (Papertrey Ink) measuring 3 1/4".  To complete the ornament I placed a couple of spoonfuls of iridescent artificial snow in the center of the assembled piece.  I used the two-piece plastic ornaments that you can buy in your local craft store.  I tapped the edge of one half of the plastic ornament into a clear and quick drying liquid glue.  I centered the plastic ornament on the scalloped circle and held it in place for a bit.  Then I let it sit undisturbed until the glue dries.  If you pick it up and shake it before the glue dries completely the iridescent snow will stick around the edge.  (I know this from experience!)  If you want that look then shake it gently and sit it back down until it dries completely.  I added a little die cut bow to the top of the ornament.  You could also add tinsel or ribbon around the edge.
 
So there you have it!  Really easy and fun to make!  Make sure you take the time to check out the great images available at RubberMoon Art Stamps!  And right now they have a section of retiring images that are on sale for 50% off!  I already placed and received my order, shown below, and can't wait to get them inky!!!
 
 
While you're there make sure you check out the RubberMoon Mail Club!  Each month you'll receive an exclusive stamp, sometimes along with some really cool extras, and will have access to a club Facebook page and monthly tutorials from Kristen Powers!  There's also a monthly ATC swap and periodic special offers on RubberMoon Art Stamps.  Kristen is very generous with the discounts she offers exclusively to club members!

Thanks for stopping by and have a great day! 

Saturday, November 29, 2014

12 Tags of 2014 - November

Just popping in to post my November tag for Tim's 12 Tags of 2014.  I don't have the die/embossing folder combo that he used so I've been mulling over what and how I could do to make this tag.  Since month-end is looming I figured I better just get it done!  I decided to use the Tattered Leaves embossing folder and no die.


Here's how I did it!

I followed Tim's instructions up until the point where you have to die cut the corrugated cardboard.  At that point I matched my tag up with the tag-shaped corrugated cardboard and slipped in into the embossing folder.

I lined up the embossing folder image with my already embossed tag and then pulled out the tag leaving the cardboard in place.


I ran the folder through my big shot and embossed the design onto the cardboard.

Then I used an exacto knife to cut out the leaf shapes.


Done!

It doesn't quite match up perfectly but it's good enough for me!  At this point I followed the rest of Tim's steps.  I used a different walnut stain spray and bronze Perfect Pearls mist since I also don't have the distress stain sprays.  Here's the end result!
 
It's a great feeling to make do with what you have on hand.  I'm determined to make all 12 tags this year and I'm happy that I got this one made in time.  One more to go!!!

Wednesday, October 8, 2014

12 Tags of 2014- October

I love Halloween so I couldn't wait to have some crafty fun with this October tag for Tim's 12 Tags of 2014!  I don't have the Carved Halloween stamp set that Tim used so I used my favorite image from the new Halloween Blueprints 3 set.  I love any type of check, diamond or dot print so the black cat from this set is my favorite!


I first stamped and watercolored the cat image with the front half purple and the back half green.  After I finished I decided it would look better the opposite way so that is what you see here.  I had to put my spider on the other side of the tag because of the shape of the cat.  I don't have any of the new distress sprays so I created my own using the Distress reinkers and water in the Ranger Mini Mister bottles.  It worked great!  I'm sure the concentration might be different but that's the beauty of making your own distress sprays!  They can be as intense or subtle as you like!  I spritzed the tag with Perfect Pearls Bronze as a substitute for the bronze distress spray.

I used the Idea-ology Alpha Tiles to spell out "EEK".  The "monocle" that I used is actually an optical lens that I've had in my stash FOREVER!  It's larger than the Idea-ology monocles so I had to take remove the hinge clasp from the Idea-ology watch chain to shorten it so that the monocle wouldn't cover the spider!  I noticed that the picket fence distress paint was rubbing off the backside of the monocle after it dried so I coated it with a thin layer of Ranger glossy accents.  That seemed to do the trick and seal it from rubbing off any further.

Love this tag!  And, as usual, I made a second one to share!


Thanks for stopping by!  I hope you'll take the time to play along and make a tag as well!

Tuesday, September 30, 2014

12 Tags of 2014 - September

Popping in to quickly post my September tag for Tim's 12 Tags of 2014!  I had other ideas for applying his technique but since I waited until the last day to do this I had to go with copying his tag.  I LOVED his tag and would have made at least one just like it, anyway, in addition to my other idea.  Anyhoo, as usual I made two so I have one to give away.


I used Willow alcohol ink on my background because I didn't have Lake Mist.  It was a little dark so I put some alcohol blending solution on a piece of felt and wiped it across the surface of the glossy paper and that took off some of the color leaving me with a lighter background.  I used the Botanical Remnant Rubs that Tim used on one of my tags and Life Quotes on the other.  I probably should have more butterflies on each tag but in my haste I made two tags and only one strip of colored paper so I had to spread them out!!  I didn't apply them in the rainbow pattern but added them randomly.  All-in-all it's still a very pretty tag and I loved getting out those alcohol inks!

Also, a big shout of thanks to Cheiron over at Cheiron's Crafty Life!  She held a giveaway back in July and I was the lucky winner of the Daydream stamp set used on this tag!!  Be sure to visit her blog.  She designs for Hero Arts and the Simon Says Stamp Challenge blog and her work is fabulous!!

Thanks for stopping by!

Thursday, September 11, 2014

Frilly and Funkie - From the Heart

Hi Everyone!  Today I am guest designer over at the Frilly and Funkie blog!  I'm so excited to be part of this challenge and I'm honored to be showcasing my work along with all of the other super-talented Frilly and Funkie design team members!

Trace is our host for this fortnight and the theme is From the Heart.  Make a vintage project to have hearts as the focal image.  You can make a dimensional piece or a card or tag with hearts as the focus.  Well, I don't know about all of you but I got tons of inspiration from the Hip to be Square challenge that Frilly and Funkie recently held!  So I used an artist trading box, or ATB, to create this photo display!

 
And here's a view of the other side... 


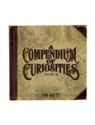
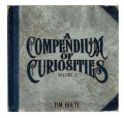
The ATB is covered with a sheet from the Tim Holtz Wallflower paper stash.  I distressed the edges of the covered box with Walnut Stain DI.  I decorated each of the four sides with hearts cut from the Tim Holtz Sizzix Alterations Love Struck die.  Each heart demonstrates a different surface technique from the Tim Holtz Compendium of Curiosities books, Volumes II and III.

This first heart is Painted Industrial from Volume III...
 
 
This heart is Colored Crackle also from Volume III... 


This heart is Texture Trade Techniques from Volume II.  I cheated a little bit on this one because I still hoard have a lot of the old textured grungeboard!  I used that instead of first adding texture with an embossing folder!...

 
This heart is Distress Glitter from Volume III... 


I added some burlap behind each heart, for texture, and then cut and stamped the mini Tattered Banners.
 
The frame was cut from grungeboard using the Tim Holtz Sizzix Alterations Ornate Frame die.  The finish on the frame is also the Colored Crackle technique.  The hinge clip at the top holds the two frames together and allows for the photos to be changed.   Instead of two photos you could also put a photo on one side and a stamped sentiment on the other side. A chalkboard-style sentiment would look really nice!  I may have to try that!


And there you have it!  I really appreciate the opportunity to play along with Frilly and Funkie on this challenge.  I hope that you'll find the inspiration to create your own From the Heart art piece and enter it in the challenge.  Who knows, maybe YOU will be the guest designer next time!

I've listed below all of the supplies that I used to create my piece.  These can all be found in Linda's shop, The Funkie Junkie Boutique!

Thanks for stopping by!