
I like to write things down. I know that might be unusual in this hi-tech age we live in. I have an iPhone 4S and I don't talk to Siri! I don't dictate my shopping list to her! I write it down. Along with my craft ideas, craft supplies that I want to buy eventually, blog sites I want to visit, etc. Because of this I end up using a lot of notepads and notebooks. So I decided to personalize a composition book that I purchased at the dollar store. I also found a package of 3 mini composition books at the dollar store. Both sizes are perfect for this project!

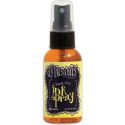
I started with Ranger Inkssentials Manila cardstock. I placed a sheet of cardstock on my craft sheet and misted it with water using the Ranger Mister. Then I sprayed Dylusions in Squeezed Orange, Bubblegum Pink, Pure Sunshine and Lemon Zest. I rolled the paper with a "kitchen roll" as Dyan would call it! Then dried the paper with my heat tool. Then I repeated the same steps with the second piece of cardstock. You can use any method to create your background paper or even use printed scrapbook paper.
Next, open the composition book and place it over one piece of the paper you want to use as your background. Line the edge of the paper up with the edge of the black spine and trace around the composition book with a pencil. Repeat this step for the back cover.

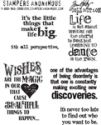
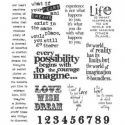
I planned my stamp layout as I wanted to use Tim Holtz word stamps and wanted to be able to see all of the images. You can also randomly stamp the background, going outside of the lines you've traced, and you'll end up with a collage background when the papers are trimmed to fit the book. I laid out the cling stamps in an arrangement that I was pleased with.

The beauty of the cling stamps is that you can leave them all in place while you're stamping the layout. I positioned each stamp in the corner of the stamping block so that I could stamp the image without removing the other stamps.

I stamped each image using Pitch Black Ranger Archival Ink. Once the front cover was completely stamped I repeated the same step for the back cover. Then I used a paper trimmer to trim the sheets along the pencil lines made when I traced each cover of the composition book. Then I applied cold laminate to each sheet to protect the cover from spills and make it more durable. Use scissors to hand trim the rounded corners along the pencil lines.

I like to add a decorative paper to the spine of the book. You can leave it black, if that's your preference, but I used Ranger Inkssentials Matte Glue N Seal to add a piece of coordinating marble paper to the spine of my book. Prior to gluing the paper to the spine I sanded the spine, and the cover of the book, with the Idea-ology Sanding Grip to remove the glossy finish. This will help the papers fully adhere when I glue them to the book.


Allow the spine to dry. Once dry use Glue N Seal to glue the front and back covers you created to the book. Place a stack of larger heavier books on the book and leave it to dry.

And there you have it! A super easy way to personalize an inexpensive composition book. You can even take it a step further and put decorative paper on the inside of the front and back covers, add a pocket or envelope to the inside of the covers and even add an eyelet and ribbon for a closure. Do anything you want to make it yours!

Thanks so much for stopping by! I hope you'll play along with us at Frilly and Funkie by showing us what you spruced up!
The following items that I used on my project can be found at The Funkie Junkie Boutique! The boutique offers it's merchandise at a 20% discount from the typical retail price! That's a great deal and you should check it out!!
 |  |  |  |  |
 |  |  |  |  |
 |  |

Fab transformation Donna ! Love how you've planned your design out. Sue C x
ReplyDeleteI agree with Sue... it's fabulous, Donna! So bright and colorful. Love it!
ReplyDeleteLove this altered notebook, so much prettier this way! You reminded me that I need to finish what I started several months back with 3-ring binders. Same idea, but I stamp on paper and then insert in the plastic. Works well for knowing what stamps are in a binder! Now I have no excuse to not finish!
ReplyDeleteWay way way cool! Makes you want to use it...lol! I love the sunrise color scheme...gorgeous!
ReplyDelete